Create a new Campaign
Create and manage campaigns - Local SEO reporting
We have created these tutorials to help you get the most out of your Georanker campaigns. In addition to this guide, you can explore all the tutorials & videos linked from our documentation page.
In this article:
How to create the first campaign
Campaigns module
Manage Campaigns
Bulk Campaign Import
Campaign Insights
How to create a campaign
After the creation of the account, the Registration Complete screen is linked to the Campaign Creation page. Just click Get Started and let's go:

New campaign creation module is composed of 4 steps
- Basic campaign information
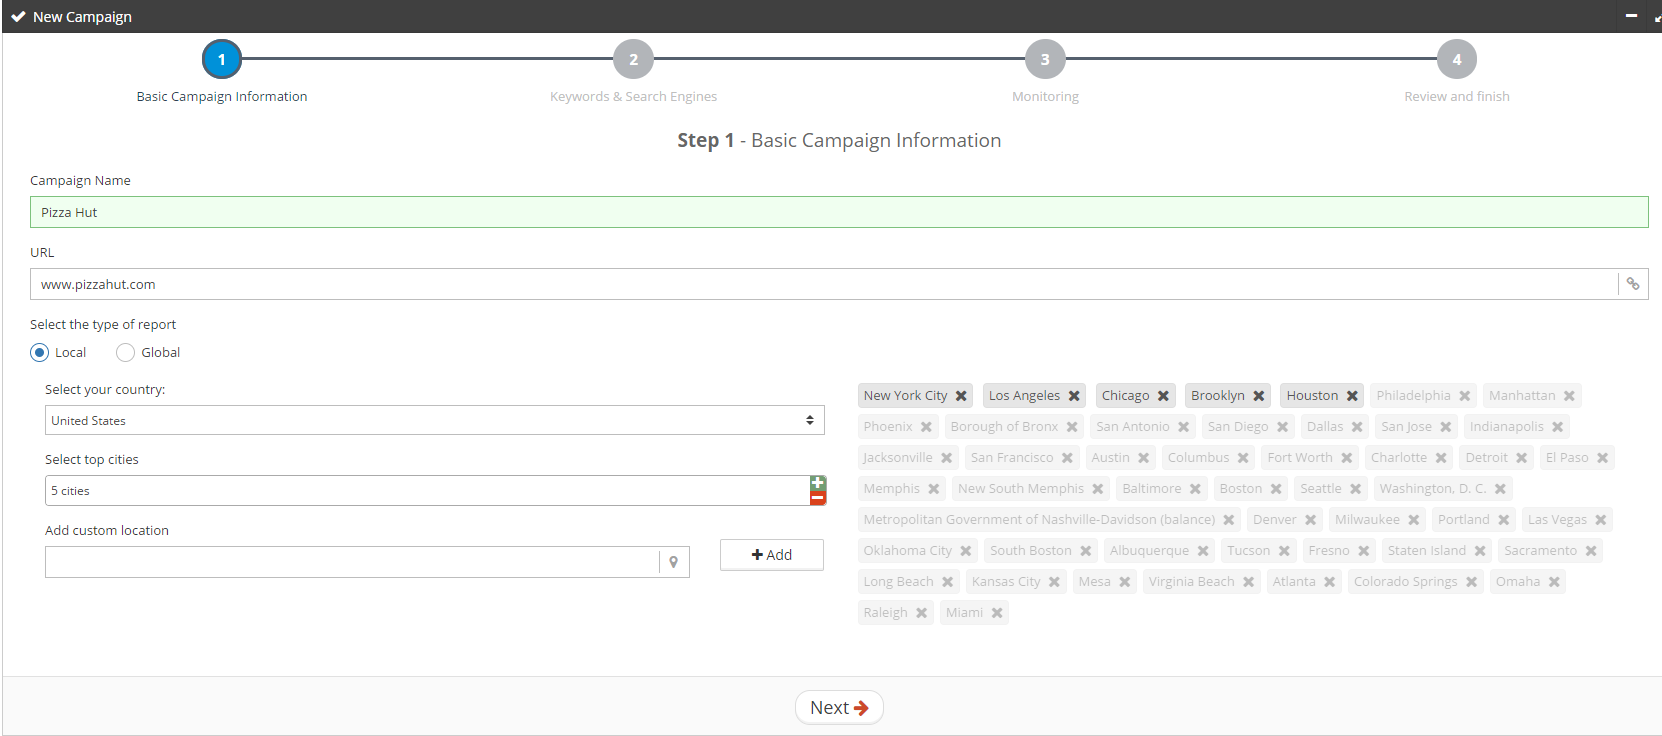
Fields:
Campaign name - Enter the name of the campaign, usually the name of the website
URL - Website URL
Select the type of report - Local, on cities or Global, on countries
Country - It's geo-localised, will show the country you are placed in, but you can select any other country
Select Top Cities - Number of cities/countries
Add custom location - You can add any location down to a ZIPCODE. Neighborhoods or counties can be also added
City Selection Section - After selecting the number of cities, the algorithm automatically selects that number of cities from the list. You can drag and drop any other city in front or use the Add Custom Location field
Click next for step 2
- Keywords and Search Engines

Fields:
Keywords - Enter the keywords you want to get ranking data. You can use the Variable List
Search Engines - In the campaigns module, you can only select Google and Google Maps
Click next for step 3.
- Monitoring

Fields:
Notifications & Alerts - For alerts on the email, check the box
Email CC - Add emails to be in CC
Automatically generate RankTracker reports: - Select the frequency of the monitor: Daily, Weekly, Fortnightly, Monthly. At the same hour when the monitor is set up, the results will be pulled out of the selected search engines
Click next for step 4
- Review and finish
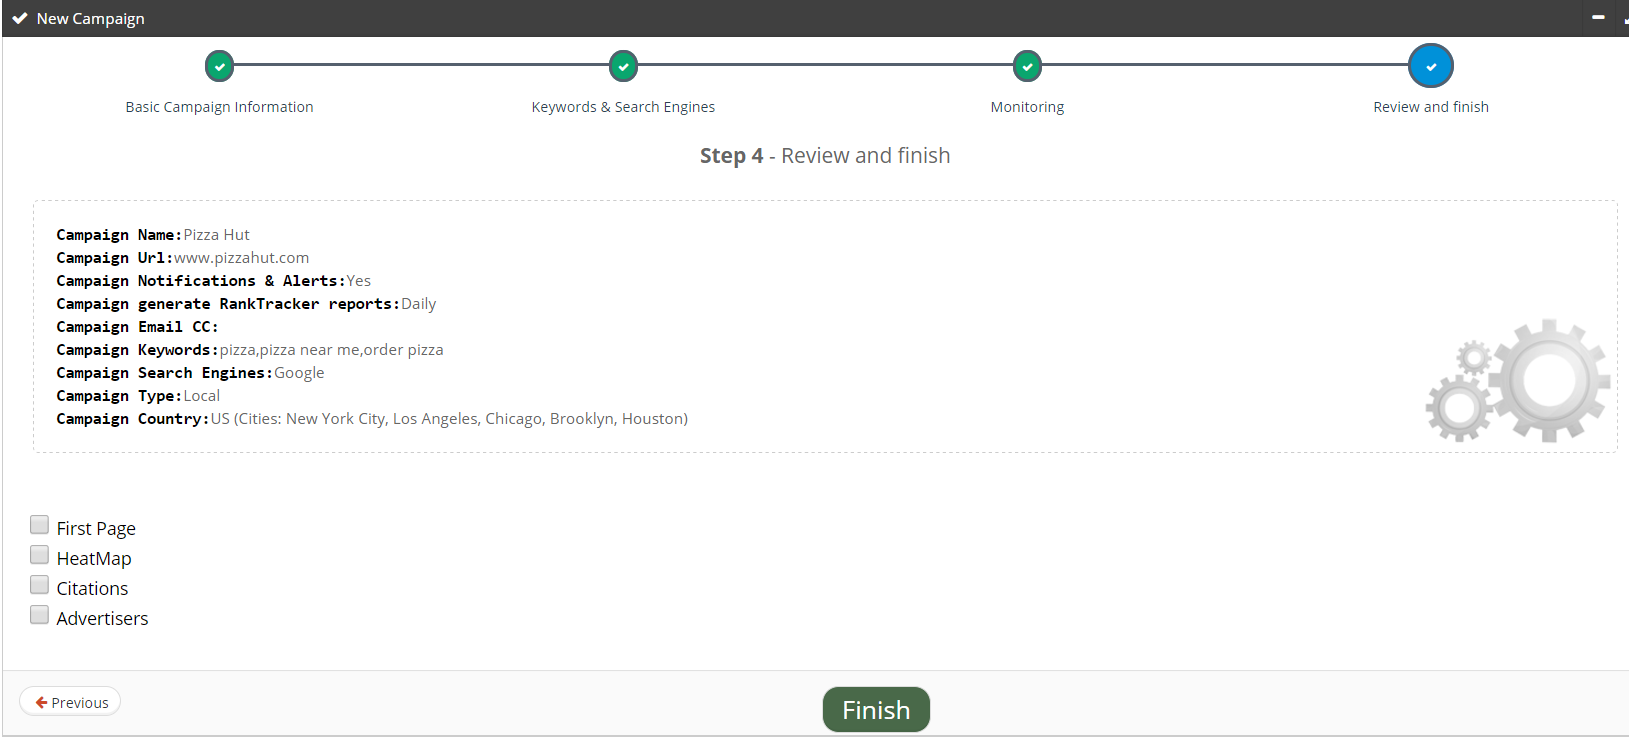
Fields:
Data Verification - Check if everything is correct, if there's any mistake, just go back from the browser
Other tools checkbox - From the monitor creation you can create 4 other kinds of reports directly with the same data
First page
HeatMap
Citations
Advertisers
Campaigns module
After creating the first campaign, you will automatically enter it. You can set-up any kind of reports that will be found also in this campaign. The campaigns module is found bellow the Logo.
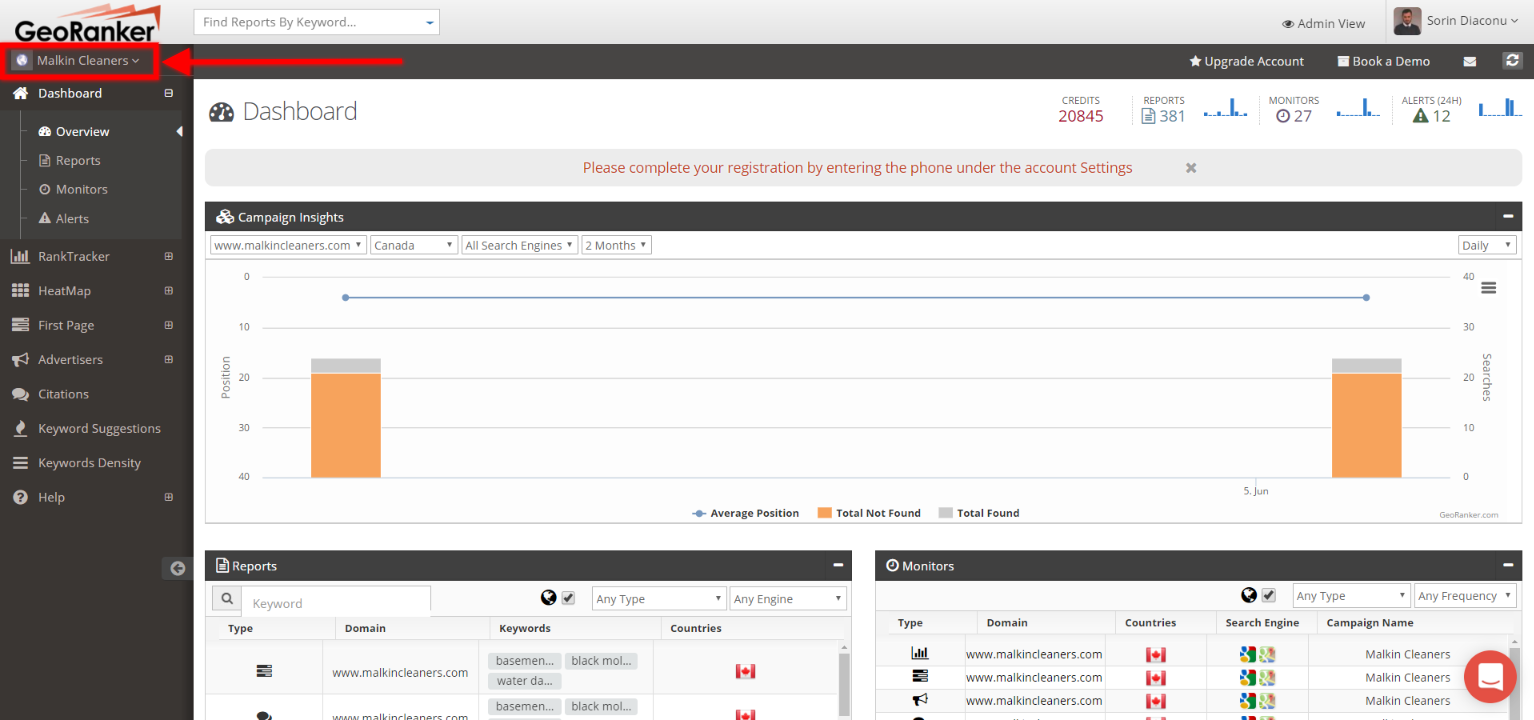
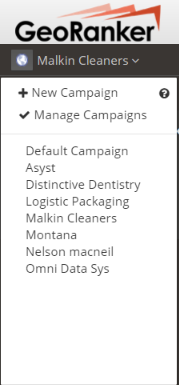
Click on the campaign name and see:
New Campaign Button - Create another campaign
Manage Campaigns - Delete, edit and change the campaigns
All the campaigns from the account - Select any campaign
Manage campaigns
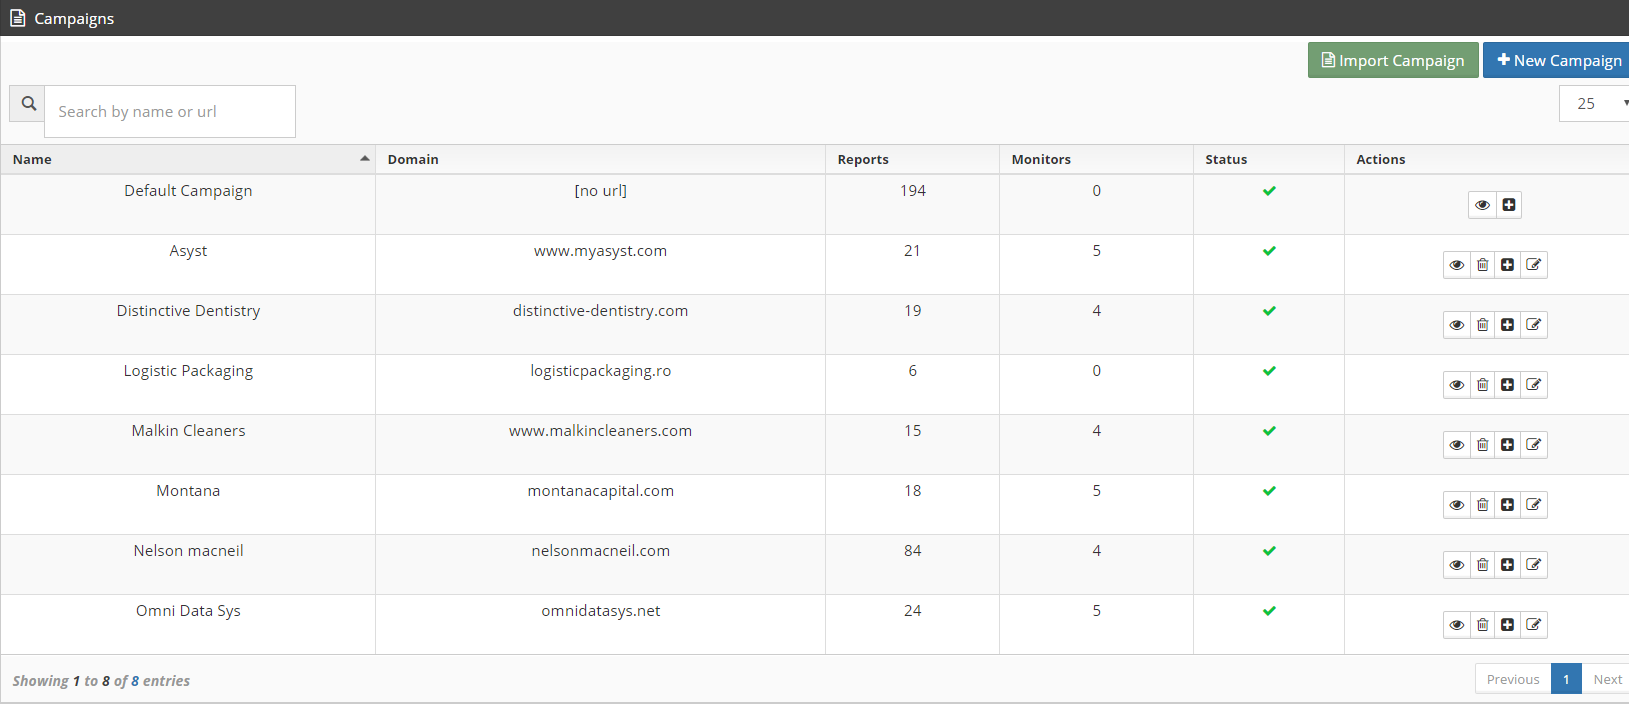
Manage your campaigns - edit, delete, view, see the number of reports and monitors
Bulk campaigns import
GeoRanker allows to import bulk campaigns in CSV format:
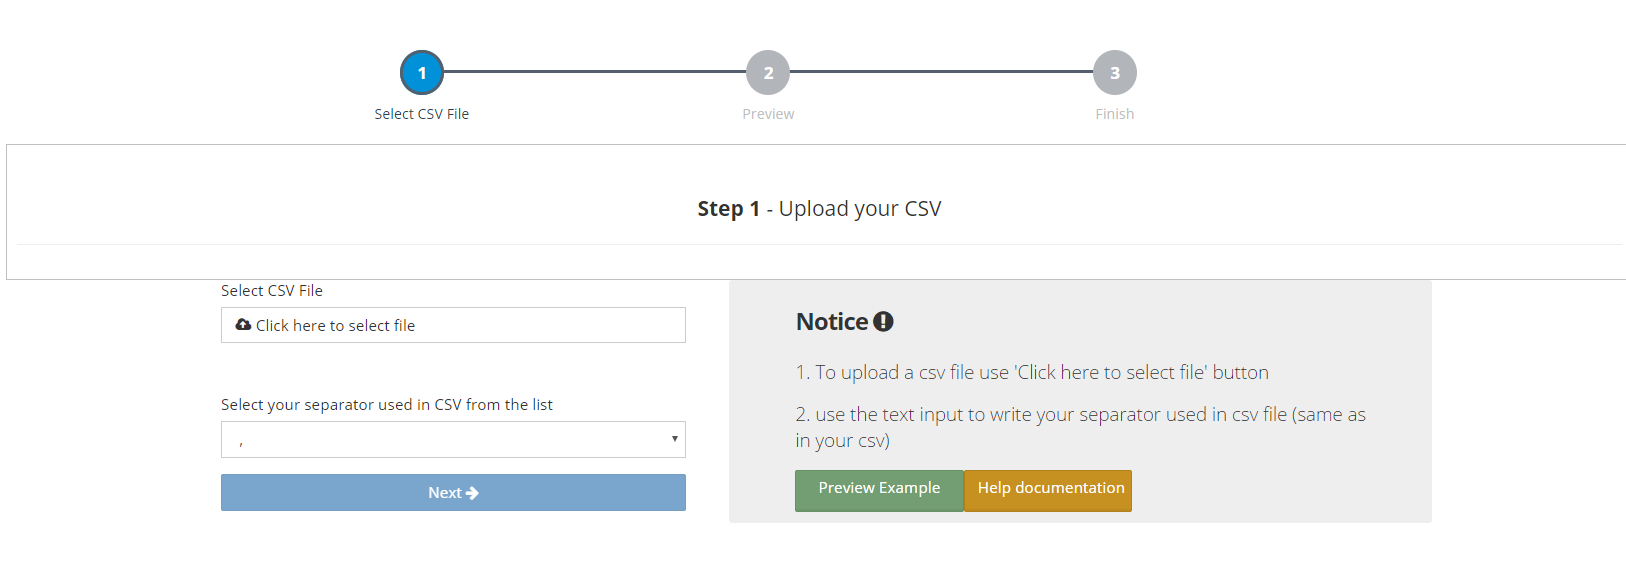
The CSV creation must be like in the example offered on Import Campaigns via CSV, preview/download example.
In the preview, we have a header to know which data will be necessary.
The separator used in CSV must be the same with the selected one from the page. The separator will separate the data to match with the header.
The header must be in CSV, at first line from it.
Details regarding data from CSV:
- name: the name of the campaign
- URL: the URL for the campaign; all reports will be based on this URL
- type: the type of the campaign which will be reflected on the reports. Here are two options:”local” and “global”
- citiesNumber: number of cities.
- cities: the cities listed which will be used in campaigns. Here you can add in CSV via “”(e.g.: “Paris Marseille”) or just separated by space(e.g.: Paris Marseille)
- countries: here it is necessary to provide the country code/s for the campaign. Is necessary to write with uppercase(e.g.: RO FR IT) and these country codes must be separated by space
- keywords: the keywords to use on reports creation. please use separators, like “,” or “;”. But make sure that this is different than the global separator you had selected for your csv data. (e.g.: ,ball;glass photo,)
- searchEngine: the search engines used on the reports. Here we have two options: google and google plus. the corespondents of these search engines are: 1 -> google; 2 -> google plus.
- e.g.: if we want to select both search engines we will have : 1 2
- periodicity: here will specify the periodicity associated monitors reports created.
- The options are: w(weekly), d(daily), f(fortnightly), m(monthly).
- Is enough to put one of these options at this field
- sendAlert: may be 1 or 0. If you choose 1, then you will receive an email with details about your monitors/reports.Otherwise(if you choose 0) this functionality will be deactivated
- emailCC: you cand put another email as CC for the emails received from geoRanker. if you don’t want that, just let the field empty(e.g.: something,,something)
- createReportName: you can select what kind of reports will be created beside the default type of report: rank tracker. You can choose from the reports specified in the header. 1 means create the report and 0 not.
An example of a campaign from CSV is here: gmailCampaign,www.gmail.com,local,4,”Zaragoza Granada Vigo Palma”,ES,email client online,1,m,0,[email protected],1,1,1,0,1
Campaign Insights
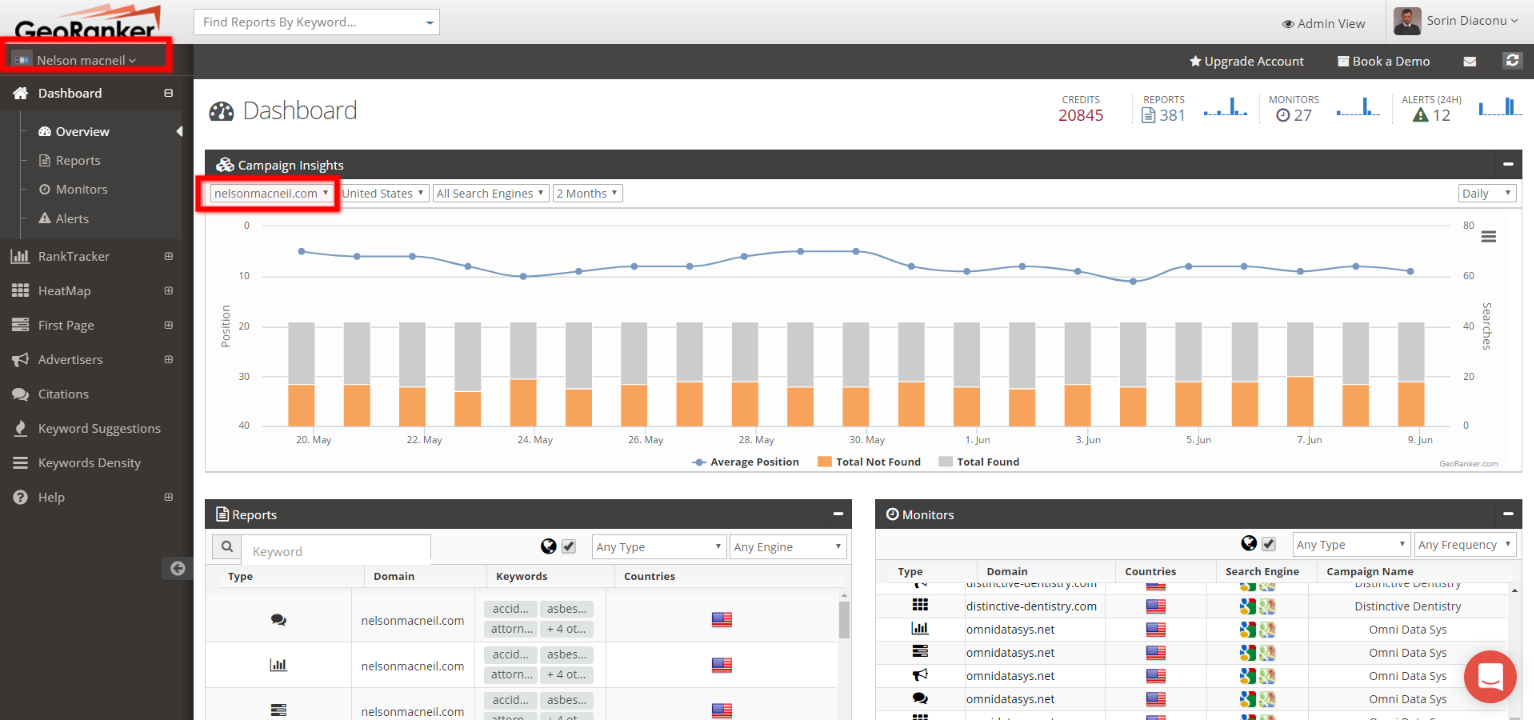
The Campaign Insights segment is being analyzed on large here. For each campaign, the first block from the dashboard will change displaying graphically the Key Performace Indicators for the selected campaign.
Updated over 8 years ago
